1-5: Beyond the Run Button
When developing a standard JVM application or an Android application, we frequently rely on the Run button provided by Intellij IDEA or Android Studio. Yet, have you ever paused to wonder what this simple button press signifies? Where can one find Gradle Task implementation and the sequence of command executions? This section aims to illuminate the answers to these queries, setting the stage for further exploration in the subsequent chapters.
1-5-1: Demystifying the Run Button and Customizing Commands
Many of us embark on our Android build journey with the Run button in Android Studio, a handy tool for packaging and installing APKs onto our debugging device. However, understanding exactly what occurs when you click Run might require a moment of contemplation. Those with keen eyesight may note that the answers are subtly revealed in the Build panel.
Executing tasks: [:app:assembleDebug] in project /Sample

Starting Gradle Daemon...
Gradle Daemon started in 656 ms
> Task :buildSrc:generateExternalPluginSpecBuilders UP-TO-DATE
> Task :buildSrc:compilePluginsBlocks UP-TO-DATE
...
> Task :app:packageDebug UP-TO-DATE
> Task :app:assembleDebug UP-TO-DATE

BUILD SUCCESSFUL in 12s
313 actionable tasks: 11 executed, 302 up-to-date

Build Analyzer results available
In the simplest scenario, the base Task executed by the Run button corresponds to the assembleDebug Task for an app module, which relies on the com.android.application Plugin. Here are a few notable variations:
- If you select the release variant for the app module in the Build Variants panel, Android Studio will execute the
assembleReleaseTask instead. - Similar build commands can be invoked through menu options such as
Build -> Build Bundle(s) / APK(s) -> Build APK(s)Build -> Generate Signed Bundle / APK.
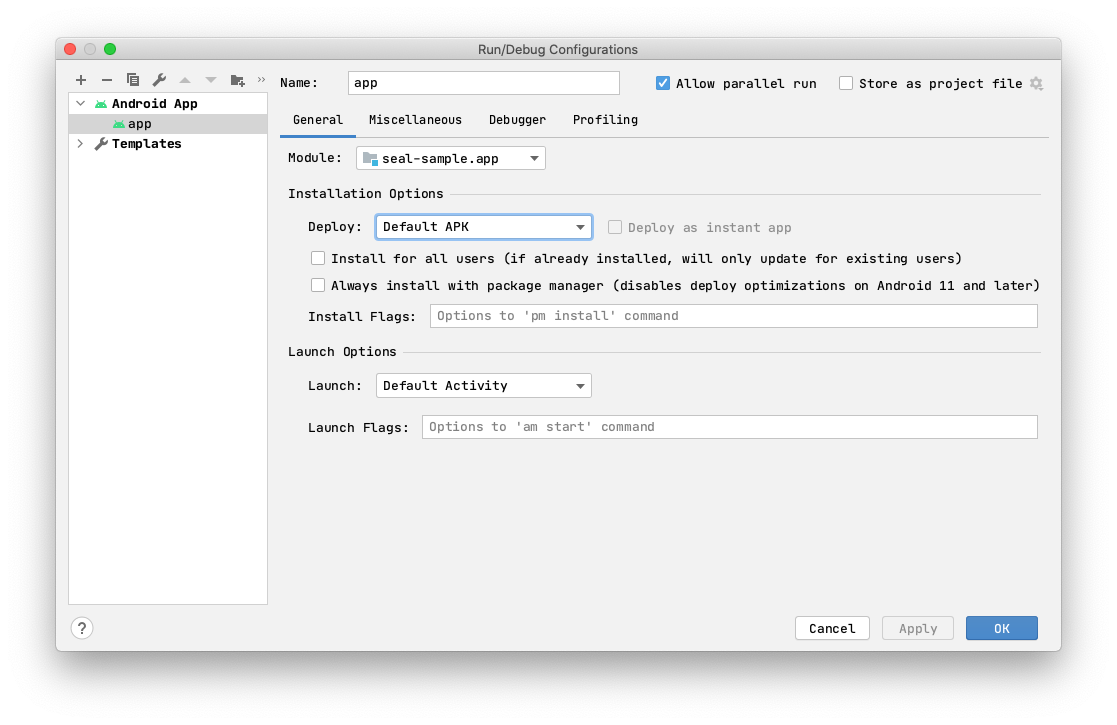
The Tasks commonly structured as :${projectName}:${taskName}. The default assembleDebug command solely builds the APK; it does not include any operations to install or open the application. The installation aspect is managed via the Run button's configuration setting, labeled as Deploy: Default APK. This setting triggers a command to automatically install the built APK and launch it. We won't delve into other options at this point, but I encourage you to explore them on your own (Figure 1.5.1).
Launching 'app' on Pixel 4a API 29.
Install successfully finished in 401 ms.
adb shell am start \
  -n "scrachpaper.sample.demo.debug/scratchpaper.sample.MainActivity" \
  -a android.intent.action.MAIN \
  -c android.intent.category.LAUNCHER
Connected to process 18499 on device 'Pixel_4a_API_29'.
1-5-2: Exploring CLI Command Execution
Now that we've delved into the underlying commands, why not get hands-on with the Command Line Interface (CLI)? Executing Gradle commands through the CLI is essential, particularly for extensibility or integration into Continuous Integration/Continuous Delivery (CI/CD) processes. The official Gradle documentation provides a comprehensive guide on CLI commands, which I highly recommend for those new to Gradle and Android development to revisit frequently.
Moreover, the Android official documentation offers a succinct introductory guide, covering the assemble${variant} commands we've previously discussed and expanding on the installDebug command for package installation (though it does not include an option for launching the app post-installation). Commonly, we employ the project's own gradlew wrapper to execute commands. For instance, executing ./gradlew clean installDebug --rerun-tasks completes a build and installation of an APK without retaining a build cache.
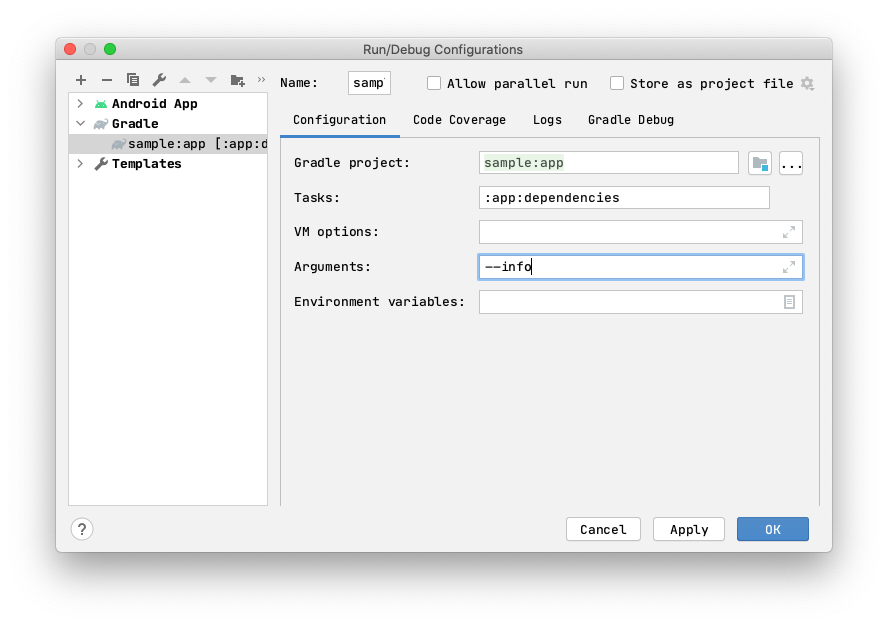
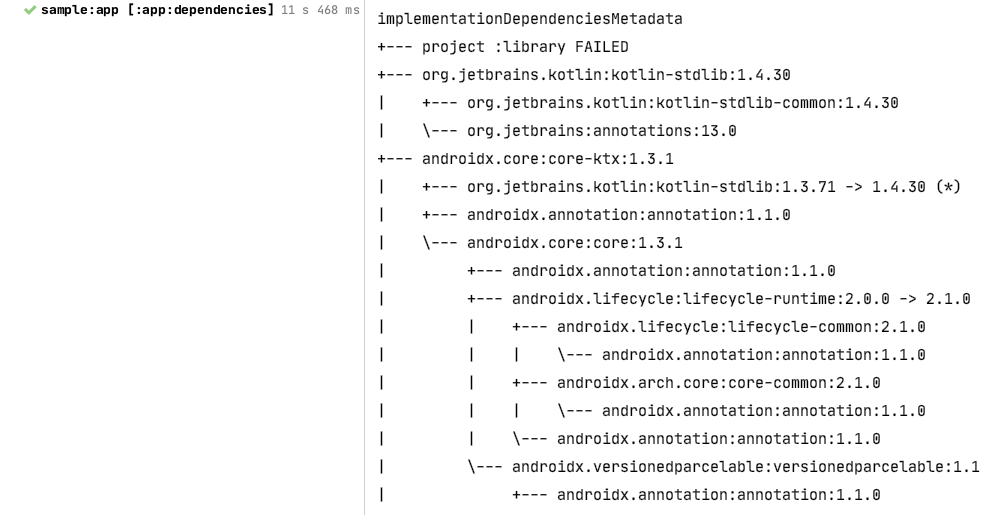
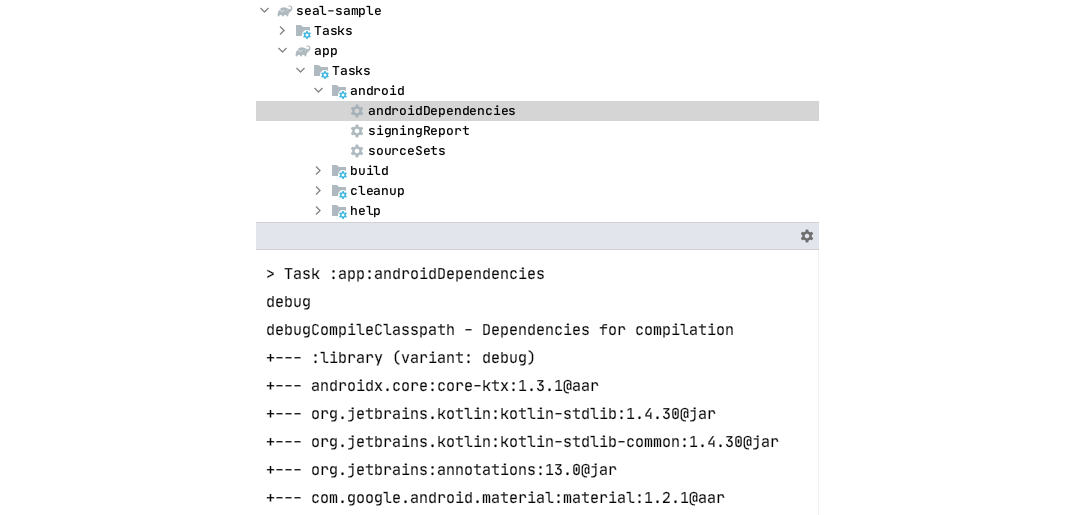
Furthermore, for frequently used commands, we can preserve them in a .sh/.bat script or add a new Gradle command within the configuration panel of the Run button. For instance, you might add a command :app:dependencies to visualize the dependency tree (Figure 1.5.2 and 1.5.3), which can be exceptionally helpful when troubleshooting dependency issues.
1-5-3: Gradle Task Panel
Beyond the assemble${variant} command, there may be a need to explore other available commands. Fortunately, IntelliJ IDEA and Android Studio (AS) readily provide this feature by default. If your project is a Gradle project, you will be able to access the Gradle Task panel, typically situated at the top-right corner of the interface (although its location can be adjusted). This panel organizes commands categorically, allowing you to execute them with a simple double-click.
Alternatively, tasks can also be searched for via the CLI. Executing ./gradlew tasks will yield a list mirroring the tasks found in the aforementioned command panel. Of particular interest are the AGP Tasks found under app -> Tasks -> other, such as compileXxxxx, mergeXxxxx, and so forth. These Tasks allow us to examine the intermediary products of key compilation processes.
1-5-4: Task Exploration: Identifying Task Implementation Classes and Utilizing Debugging Tools
To become familiar with Gradle, it is often required to comprehend the concept of Tasks and their interdependencies. Nonetheless, delving deeper into each Task, especially those provided by the AGP, necessitates the use of more nuanced techniques if you wish to discover the underlying principles or deduce practical usage and hook insights.
Initially, Gradle provides an useful command that allows you to query the implementation class based on the task name:
./gradlew help --task <taskName>Also, you can opt to clone the source code or load its source.jar locally in order to debug the specific Task flow. For further details on this process, refer to Section 2-7.
Furthermore, use Github's code search frequently. When you encounter an unfamiliar API or Task that is not in the AGP's official recipe, try searching Github for the key method or class name, making sure to select the language as Java, Groovy, or Kotlin. Finally, to understand the input and output of the Task, you need to explore the configuration process of AGP, see Chapter 3 for related content.
1-5-5: In Summary
Progressing from the familiar graphical user interface (GUI) operations to the more versatile command line interface (CLI) features, we delve into the intricate build process. Through this section, you've gained a more tangible understanding of how to work with Gradle build tools in your daily development work.